Your guide to running Varify
A walkthrough of the app itself, screenshot by screenshot, from setting up your first site to closing out a stock take. Looking to connect Varify to your own systems instead? See the API docs.
Overview
Varify keeps every site's stock, bin locations, and cycle counts in one place. The core objects are: sites (a warehouse, store, or van), locations (bin/shelf/rack codes within a site), items (your catalogue, synced in via CSV import or the REST API), and sessions (a stock take or cycle count run against a site).
A typical first session looks like: create a site → add or import bin locations and items → assign items to bins → start a stock take → count → commit.
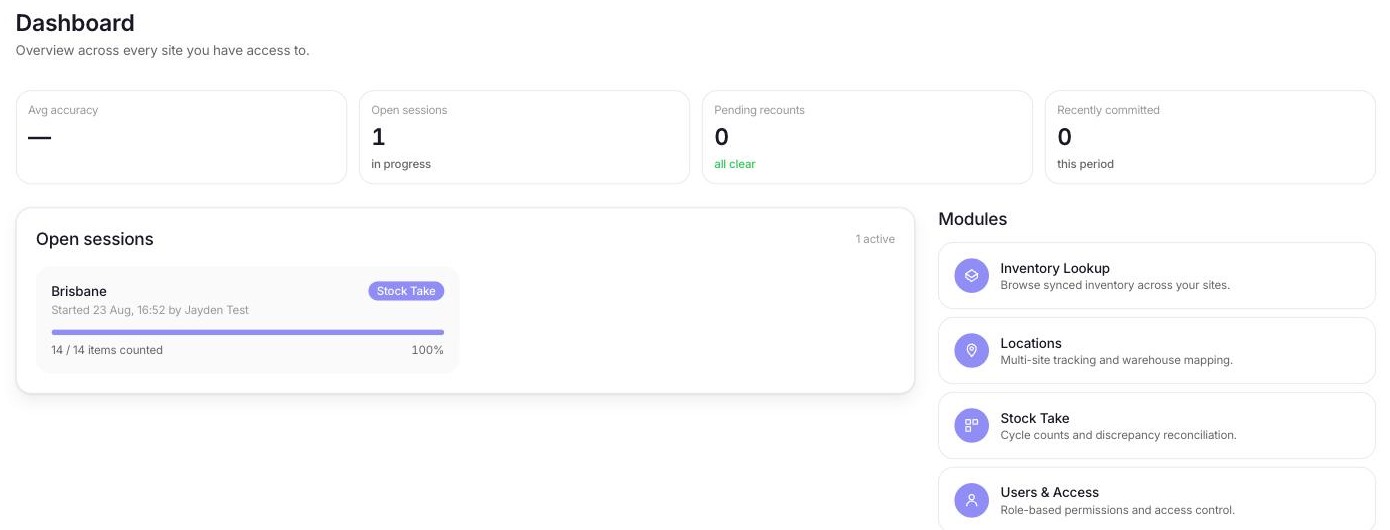
Once you're signed in, the dashboard is home base: open sessions, pending recounts, and the four modules (Inventory Lookup, Locations, Stock Take, Users & Access) are all one click away.
Looking up items
Inventory Lookup is the fastest way to check what's in the catalogue without starting a count. Search by SKU or name, then narrow by inventory type. Each result shows the item's type and which bin(s) it's assigned to at a glance.
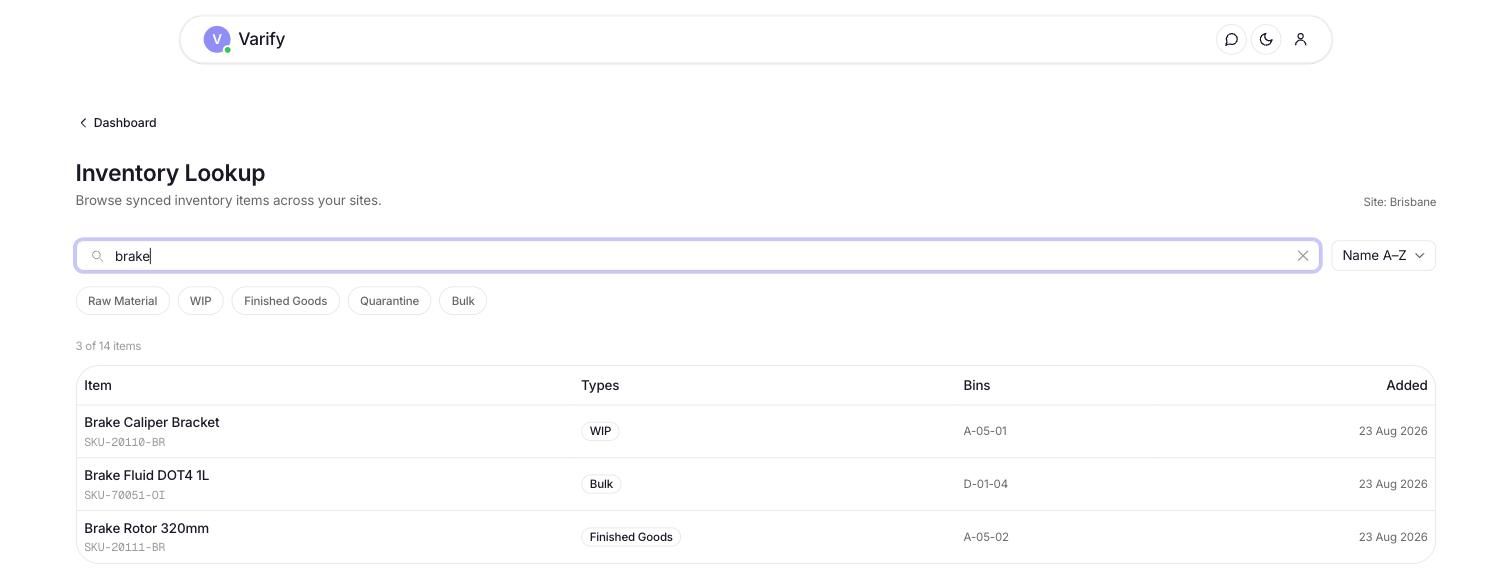
This is read-only. To change what's in the catalogue, either add items through assigning them to a bin one at a time, or bring in a whole catalogue at once via CSV import or the REST API.
Sites & bin locations
Create your first site from Billing → Manage Sites. Your plan sets a limit on how many sites you can have. Upgrading raises that limit immediately.
Bin locations live under Locations. Click + New Location, give it a code (e.g. A-04-12), and optionally set an inventory type for classification. The type list is shared company-wide, so a new one you type in here is available everywhere else too.
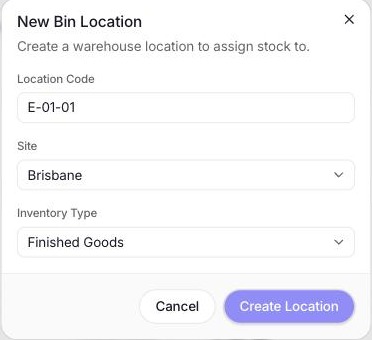
Adding bins one at a time works fine for a handful of new locations. For a whole warehouse layout at once, bulk-load them with everything else via CSV import.
Assigning items to bins
Open a bin from Locations and click + Assign Item. Search the catalogue by name or SKU and pick one. If the item doesn't exist yet, add it through import instead. Assigning only links an existing item to a bin. It doesn't create a new one.
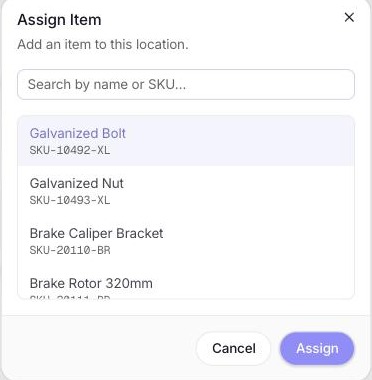
An item already assigned to a bin can't be assigned again. The action is idempotent, so nothing breaks if you or a teammate try it twice. Remove an assignment from the same bin detail page with Remove.
Printing labels
From a bin's detail page, print one item at a time with Print, a selection of them with Print Selected, or everything assigned to that bin at once with Print All in Bin. Each opens a PDF ready to send straight to a label printer.
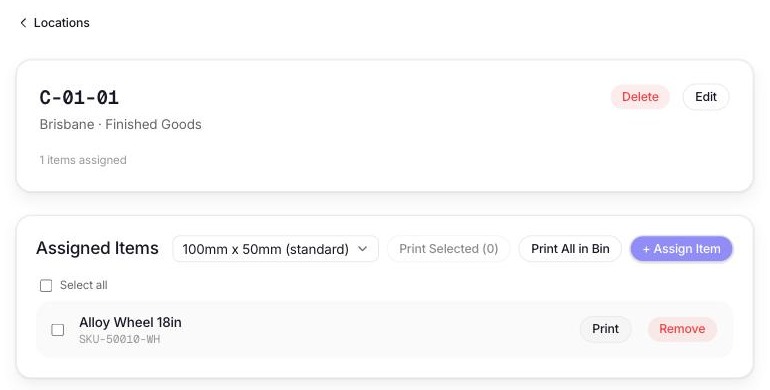
Pick a size before printing: 100mm x 50mm (standard, landscape) or 100mm x 200mm (large, portrait, with its own layout rather than a scaled-up standard label). Both are die-cut sizes commonly stocked for Zebra-class desktop and industrial thermal label printers, so you can order pre-cut rolls in either size rather than cutting sheets by hand. Every label carries a QR code encoding SKU|LOCATION_CODE. Scanning it during a count jumps straight to that item at that bin.
Adding people & roles
From Users & Access, click + Add User, fill in their name and email, pick a role, and tick which sites they need. They get an emailed link to set their own password, with a temporary password shown once as a fallback if the email doesn't land.
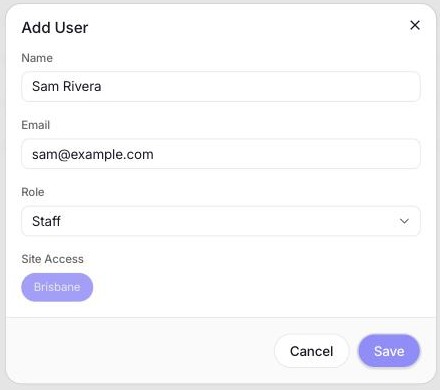
Roles are hierarchical: Admin > Manager > Team Leader > Staff. Admins manage users, site access, billing, and API keys. Managers and above can see financial impact, export results, and import data. Team Leaders and above can review variances and commit or cancel a session. Every role can log counts.
Stock take vs. cycle count
Both run through the same counting screen and the same reconciliation logic. The only difference is scope, and Varify tracks that difference on the session itself so reports stay separated by which kind of count produced them.
Stock take
A full count of a site, every bin, every item. Run it at period end, before an audit, or whenever you need a complete, trustworthy number for every SKU at once.
Cycle count
A partial count of one zone, one inventory type, or a handful of bins. Run these continuously, in rotation, so high-value or fast-moving stock gets checked often without shutting the site down for a full count.
Choose between them on the first step of New Counting Session:
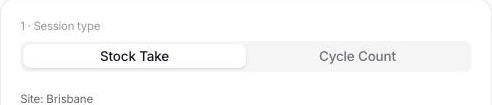
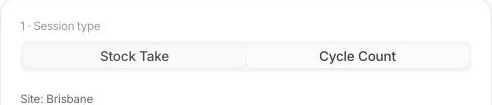
A site can only have one open session at a time, of either kind. Varify blocks starting a second until the first is committed or cancelled, so counts never overlap and double-log the same bin.
Performing a stock take
Start one from Stock Take → New Counting Session, choose Stock Take and a site. Starting quantities come automatically from whatever's currently synced for that site. There's no separate upload step.
On the Count tab, pick an inventory type for the batch you're working through, then either search the catalogue directly or scan a printed bin label with Camera Scan to jump straight to that item. Log the physical count. It appears under Your Recent Counts immediately, and syncs to the server in the background. If the connection drops mid-count, keep going: open the session once while you have signal and it works offline from there.
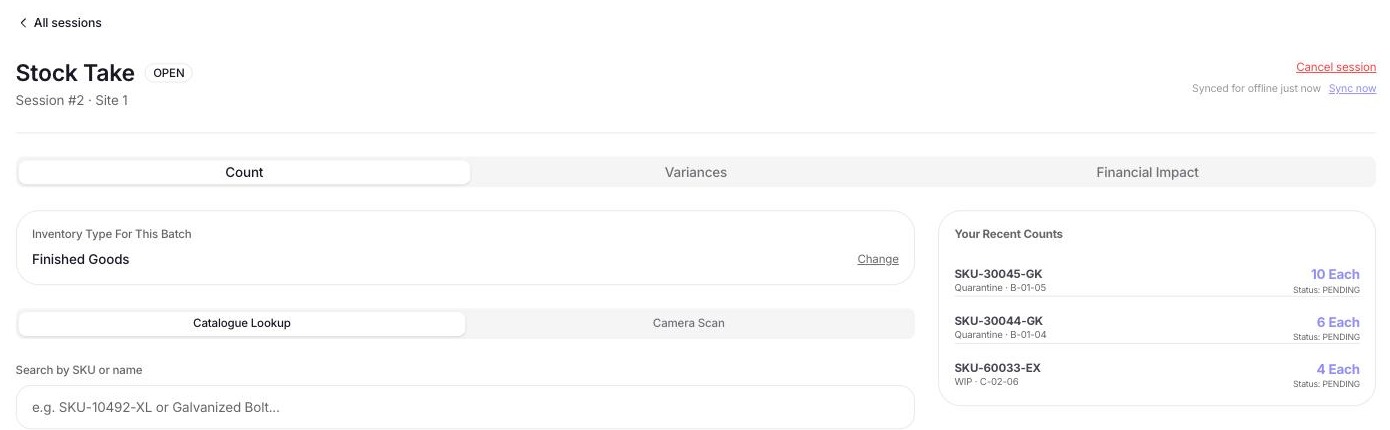
If two people count the same item, the second submission is automatically routed into a formal recount rather than silently overwriting the first. Once every recount is resolved, commit the session from the Variances tab. That locks every count, unlocks the CSV export and the printable PDF signoff report, and permanently records the financial impact on the Financial Impact tab.
Performing a cycle count
Start one the same way, New Counting Session → Cycle Count. There's no scope to configure. You count whichever bins you choose, and only those items are checked against expected stock. Anything you don't count is left out of the results. A stock take works the other way: every item synced for the site starts at a count of zero, so anything nobody counts shows up as a variance.
Counting, recounts, and committing work identically to a stock take. You get the same Count, Variances, and Financial Impact tabs, just against a smaller set of bins. Counters use the same screen for both, so there's nothing new to learn.
Because a cycle count finishes faster, it's the one to run on a rotation. Count your top-value bins every week, for example, without pulling the whole team off the floor the way a full stock take does.